By Pamela A. Keene
Whether you have a multiple-acre plot or a patio, you can grow your own vegetables. With a little bit of know-how and a sunny place, enjoying the bounty of your own labors can be fun, rewarding and tasty.
“There are so many reasons to grow your own vegetables and the flavors are ever so much better than store-bought,” says Joe Lamp’l, founder of joegardener.com and host of the nationally syndicated “Growing a Greener World,” which airs on public television in all 50 states. “Money can’t buy the kind of taste you get fresh from the garden or the satisfaction of knowing you’re eating what you’ve grown.”
Sunlight, soil and water
“Choose your spot carefully to have plenty of sunlight, at least 6 hours a day,” Lamp’l says. “Look for a place that’s not obstructed by trees or other buildings. Sunlight is one of the three basic components to successful gardening. The other two are good soil and having access to a reliable water source.”
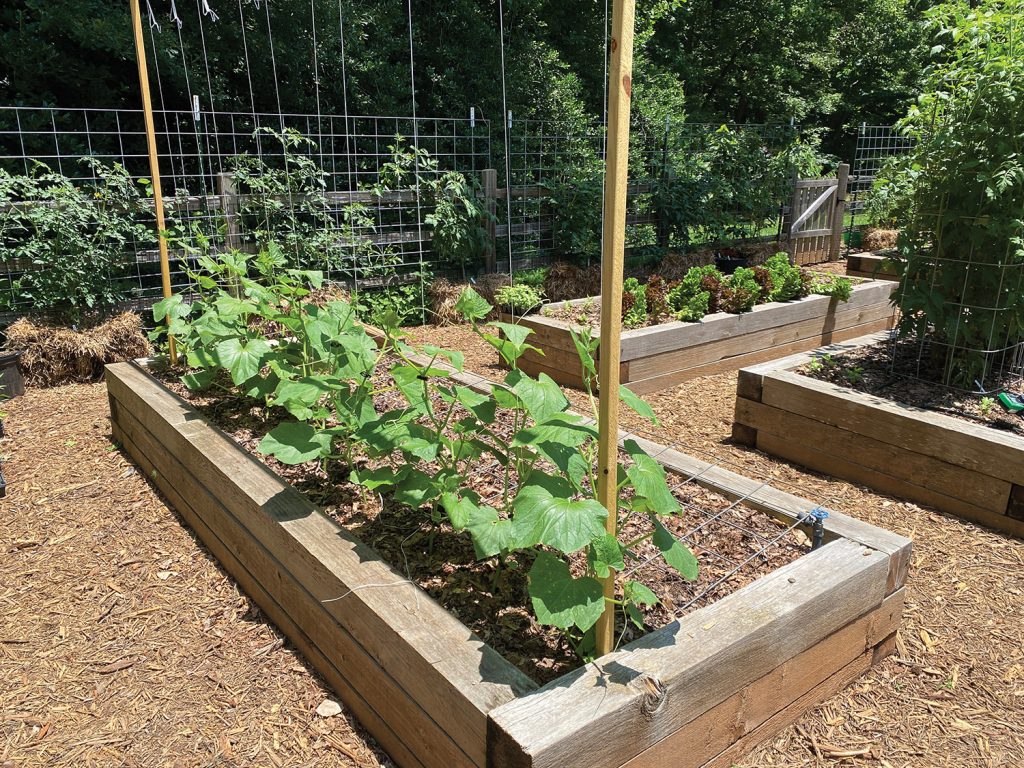
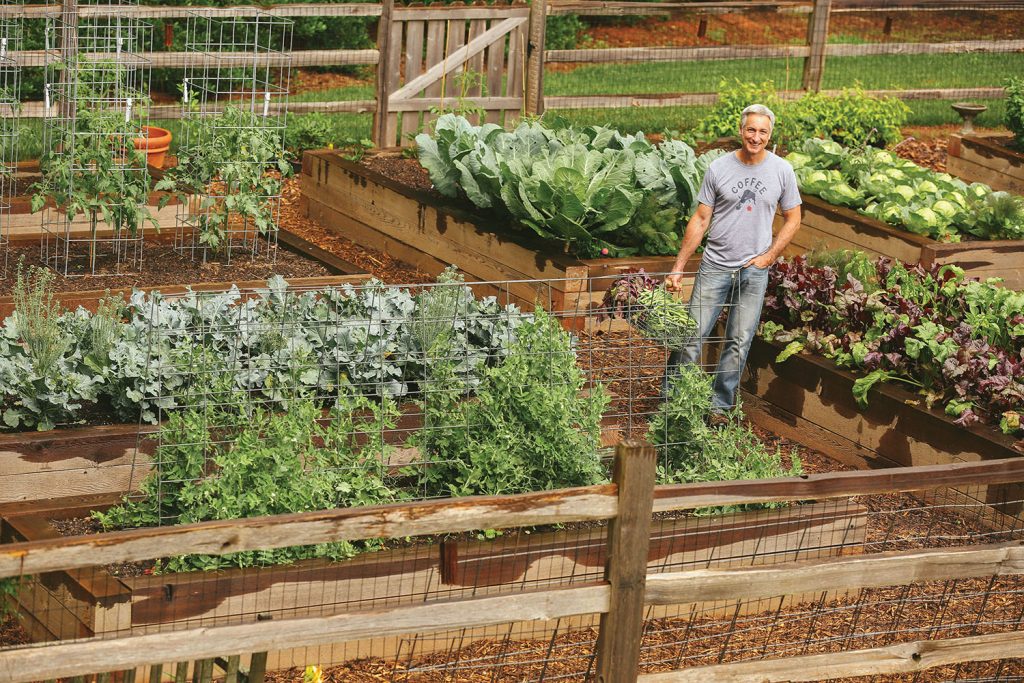
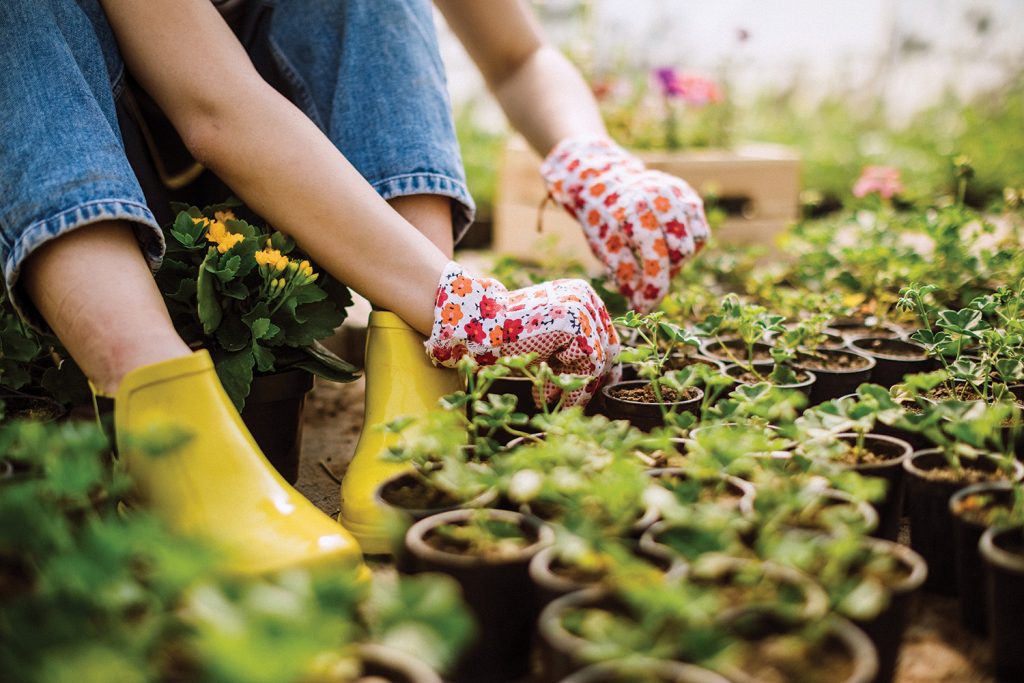
Many gardeners build raised beds. By elevating the growing area off the ground it’s easier to plant, tend and harvest with less bending or squatting.
“Most people choose wood to construct raised beds, but be sure to consider the size,” Lamp’l says. “Use 2- by 12-inch boards to build a bed that your space can accommodate. Be sure to make it about 3 feet wide to give good access from all sides. This will make weeding and harvesting easier and you can more closely inspect your plants for signs of disease or insects as they grow.”
Leave enough space between beds for a wheelbarrow to pass to bring soil and mulch into the garden area.
The soil in your garden is crucial for good production and with raised beds you have more control over the composition of the soil, the nutrients and the quality.
“Packaged garden soil is a good choice because it’s disease and weed free, but be mindful of the quality. Cheaper is not better,” Lamp’l says. “The soil provides the main support for your plants, so it needs to have the right nutrients and the right texture. If the soil compacts too easily, it will be difficult for plant roots to thrive. Amend it with organic matter, also available at your box retailer or local nursery, to promote good growth.”
Make sure a good water source is nearby to avoid constantly moving hoses back and forth throughout the growing season. “In an ideal world, drip irrigation is best, but it can be costly to install into each bed,” he says. “Consider hand watering if you have a smaller garden plot. Apply the water directly to the base of the plant to prevent wetting the foliage. Prolonged periods of wet foliage can increase the potential for plant disease.”
Watering can be tricky. “Don’t water just because it’s a certain day of the week, because you run the risk of overwatering,” he says. “Check the moisture level of the soil, and water accordingly, allowing enough flow to soak the ground. Then wait until the top inch or so of the soil feels dry before watering again. Your plants will be healthier and produce better results.”
Seeds or seedlings
Summer vegetables, such as tomatoes, eggplant and peppers are generally easier to grow from seedlings, which can be purchased at a local nursery or box retailer. Look for healthy plants with several sets of leaves. They can be planted in the garden after the date of the last frost in your area.
“If you want to start from seeds, back up your indoor starting time to have nice-sized seedlings by the ideal planting time for your region,” Lamp’l says. “I’m a big proponent of starting vegetable seeds indoors about six to eight weeks before planting, but you will need the proper light set-up and the commitment to manage the process from seeds to moving the seedlings into the garden.
Once the soil warms up, beans, squash and cucumbers are easy to plant directly in the garden. Their germination time is fairly quick. Be sure to purchase seeds packaged for the current year by finding the date stamp on the package and follow planting instructions.
“Vegetable plants are heavy feeders,” he says. “It’s important to fertilize them as they start to produce. A slow-release organic fertilizer is a nice way to deliver the nutrients on a continuous basis. Be sure to follow the application instructions for best results.”
Top-dressing vegetables with compost during the growing season provides additional nutrients and improves the soil.
Patio and deck
Some vegetables are well suited for planting in containers, as long as they have ample sunlight. Again, at least six hours a day applies.
Tomatoes are available in patio and bush forms that are more compact and better suited for containers. Growers have also introduced a wide variety of peppers, from sweet to hot, plus colorful bell peppers, that grow nicely on a patio.
“The key is to provide a container that’s large enough for the roots to grow and support production,” he says. “Containers also tend to dry out more often, so it’s important to keep them properly watered. Feeding regularly is important as well.”
Lamp’l suggests avoiding clay or terra cotta pots that lose moisture more quickly.
“Lighter-colored plastic pots work better, but make sure they have drainage holes in the bottom,” he says. “Adding a layer of mulch will help retain moisture and keep the roots a little cooler. ”
Patience pays off
Gardening is a lifelong learning experience and Lamp’l says that no one gets it 100 percent right all the time.
“Don’t get frustrated if you’re not successful in your first year of growing vegetables,” Lamp’l says. “Much of gardening is trial and error. The number of resources – YouTube, online, websites, blogs and more – is infinite and can be overwhelming, so learn to filter the sound advice from the not-so-good.
“You also have an excellent local resource just a phone call or web click away, with your local extension office,” he says. “They can help solve pest and disease issues, answer your gardening questions and connect you with other gardeners. And best of all it’s free.”
PAMELA A. KEENE is a freelance journalist who writes about travel, personality features, gardening and how-to topics. An avid photographer, she lives in Flowery Branch, Georgia, and has been published in magazines across the country.
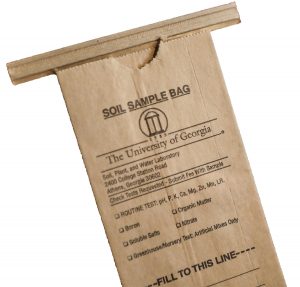
First Things First: Do a Soil Test
By Pamela A. Keene
Are your plants getting the right diet to be the best they can be? Maybe it’s time for a soil test from your local extension office. You’ll end up with a wealth of knowledge about what fertilizers to use, how to amend your soil and whether your plants are getting the nutrients they need to be healthy and prolific.
Here’s how it works:
Pick areas that you’d like to test, say for vegetable plantings, fruit trees, annuals or shrubs.
Take a sample from the area by scraping off any mulch, grass or weeds, then digging your shovel straight down about four inches into the ground. Put the soil into a bucket.
Repeat this vertical sample process four to six times in the same general area.
Mix the samples in the bucket well, then remove approximately 1 cup of soil, placing it in a clean plastic bag. Label each bag with the type of plants you plan to grow. This is very important.
Repeat in other planting areas, such as lawns, flower beds or vegetable gardens, keeping the samples separate. Different plants require different nutrients and soil acidity to flourish, so it’s important to know how to prepare your soil before you plant.
Take your bagged samples to your local county extension office. The office has official brown-paper sample bags you can transfer your samples into to be sent to the university for testing. There’s a place for your name, address and the type of planting for the area.
By testing your soil before you plant and amending it according to the recommendations, you’re setting the stage for long years of successful gardening. If the soil is right, you have a much better chance of getting your garden to grow.
The tests typically cost less than $10. The samples are sent to the state university’s agriculture department for testing. Within two to three weeks, you’ll get back a detailed report that tells you the current condition of your soil and exactly what you need to do to amend it for your plants.
For more information, contact your local extension office.
This checklist makes gardening easy!
Find a printable month-by-month gardening to-do list at goiec.org/ 374qOs6
The Nuts and Bolts of Home Food Preservation

Need some guidance on the basics of home food processing? Here are tips, terminology and resources to help you safely preserve the fruits — and vegetables — of your harvest.
Tools you may need
- Bowls of multiple sizes
- Canning funnel
- Jar lifters
- Large pots
- Measuring cups
- Paring knife
- Plastic spatulas
- Pressure cooker
- Sieve
- Slotted and non-slotted spoons
Safety first
- Practice good kitchen hygiene when processing and preserving food.
- Label and date your home-processed foods.
- If a lid does not properly seal when canning, refrigerate the contents and consume them within seven days. You can reprocess within 24 hours if the food was processed correctly but the lids have not sealed, using new lids and jars. If the food was under-processed, whether the lids have sealed or not, reprocess within four hours.
- Always use new flat lids when canning; it is not necessary to use new ring bands.
- Choose containers specifically designed for preserving food, such as Ball glass jars for canning and freezer-weight plastic bags and boxes.
- Process foods exactly as described in recipes; do not reduce times.
- Canned foods may be stored for up to 12 months in a cool dark place, such as a pantry or closet. If they are processed correctly, they may be stored longer, but they may lose quality and nutritional value.
- Frozen fruits and vegetables may be stored at 0 F for 8 to 12 months.
- Do not use chipped or cracked glass containers to can foods.
- Beware of conditions that can create botulism, including under-processed foods, canned containers with the lids bulging, contents with discoloration on the top when opened or bad smells. Discard these foods; botulism can be serious.